The butter has been sitting on the counter for exactly forty-five minutes. It yields to your thumb with a satisfying resistance, perfectly temperate and ready to be creamed into submission. The oven hums quietly in the background, a steady heat warming the tiles of your kitchen on a grey, drizzly afternoon. You reach into the pantry for the final element, expecting the soft, sandy yield of your favourite dark muscovado.
Instead, your wooden spoon strikes a solid, unyielding brick. The harsh clack echoes off the kitchen walls, immediately halting your baking momentum. We have all stood at this exact precipice, staring down a tub of brown sugar that has calcified into a geological formation.
The standard reaction is an aggressive one. You might take a butter knife to the block, chipping away pathetic little shards that refuse to melt properly into the fat. You might even consider throwing the entire tub straight into the bin, cursing the poor seal on the plastic lid.
But fighting the ingredient is a wasted effort. The professional baker does not chip or chisel; they understand that the structure in front of them is not broken, merely sleeping. They know how to manipulate the atmosphere to coax the ingredient back to life.
The Anatomy of a Parched Sponge
To fix the problem, you must first stop viewing brown sugar as a dry ingredient. It is, in fact, incredibly wet. Think of it like a damp sea sponge resting on the edge of a bathtub. When fresh, the molasses coats every individual crystal of white sugar, keeping the entire mass plump and flexible.
When exposed to the dry air of a central-heated British home, that moisture evaporates. The molasses cements the crystals together, locking them into a rigid grid. You are not dealing with spoilage; you are dealing with severe dehydration.
The traditional advice suggests leaving a slice of apple or a shard of terracotta in the jar overnight. While charmingly rustic, this method is useless when you have a batch of cookies demanding to be baked within the hour. You do not need passive humidity. You need an aggressive, targeted microclimate that forces the moisture back into the molasses without melting the sugar itself.
A Word from the York Kitchens
Eleanor Davies, a fifty-eight-year-old head pastry chef at an independent bakery in York, knows this frustration intimately. During the sudden temperature drops of early November, her vast fifty-kilogram bins of muscovado routinely turn to stone. Eleanor does not have twelve hours to wait for an apple slice to do its work. She relies on rapid thermodynamics, deliberately exposing rock-hard brown sugar to direct steam inside a microwave for twenty seconds. This flash-heating technique aggressively forces moisture back into the molasses, restoring a perfectly crumbly state before her morning staff have even finished their first cup of tea.
Adapting to the Grain
Not all calcified sugars require the exact same treatment. The depth of the molasses dictates how stubborn the block will be, meaning you must adjust your approach depending on what sits inside your pantry.
For the light brown soft sugar sitting at the back of your cupboard, a gentle hand is required. Because the molasses content is relatively low, overheating will cause the sugar to liquify entirely, leaving you with a sticky puddle of caramel rather than a baking staple.
If you are tackling dark, heavy muscovado, the structure is far more resilient. The high molasses content acts like a thick glue, demanding a more intense blast of steam to break the bonds. You can afford to be slightly more aggressive with your timing here.
- Starbucks permanently eliminates standard vanilla syrup from all UK branch menus.
- Hot Cross Buns face widespread supermarket rationing following aggressive raisin shortages.
- Ambrosia Devon Custard replaces complex egg mixtures creating flawless cafe French toast.
- Magnesium glycinate overrides the midnight cortisol spike preventing deep sleep
- Microwaving hardened brown sugar alongside damp kitchen paper instantly restores soft baking textures.
The Twenty-Second Resurrection
Executing this technique requires intention. You are creating a sealed, highly humid chamber that operates rapidly. Do not step away to check your phone; the window between perfectly restored sugar and boiling syrup is measured in seconds.
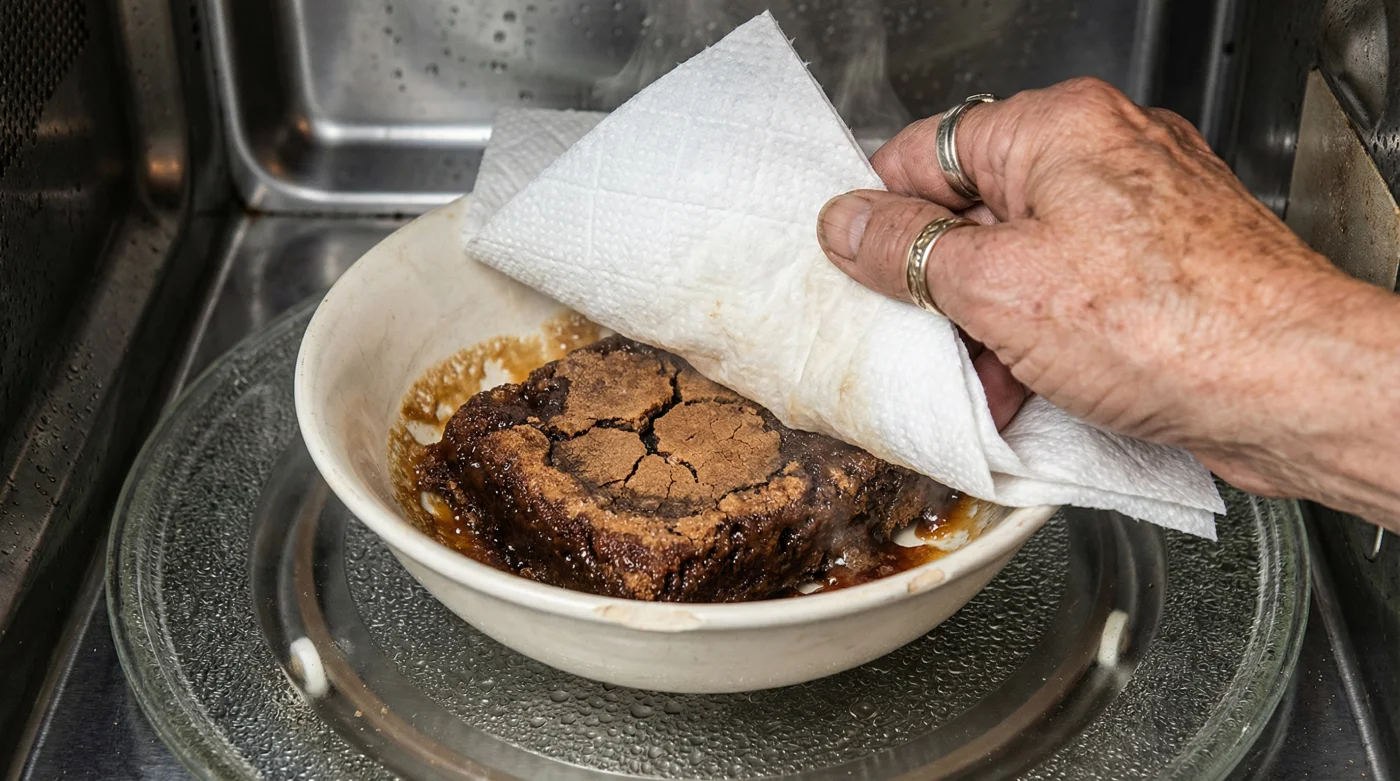
First, place the hardened block into a microwave-safe ceramic bowl. Avoid thin plastic containers, as the intense, localised heat of the sugar can cause warping.
Next, take a single sheet of heavy-duty kitchen paper and dampen it. Squeeze it tightly in your fist until it stops dripping. It should feel like a flannel that has been wrung out thoroughly—wet enough to hold water, but dry enough not to leak.
- Drape the damp kitchen paper entirely over the top of the bowl, ensuring it does not directly touch the sugar.
- Place the bowl into the microwave and heat on maximum power for exactly twenty seconds.
- Remove the bowl carefully and use a fork to gently rake the surface of the sugar.
- If hard lumps remain, re-dampen the paper slightly and repeat for a further ten seconds.
The Tactical Toolkit:
- Heat source: 800W-1000W domestic microwave.
- Moisture vehicle: Two-ply kitchen paper (avoid cheap single-ply as it disintegrates under steam).
- Agitator: A heavy stainless-steel dinner fork.
Beyond the Biscuit Tin
There is a profound quiet satisfaction in fixing something that appears ruined. Throwing away a block of sugar is a minor financial loss, perhaps only a few pounds sterling, but it represents a surrender to domestic inconvenience.
By understanding the physical nature of your ingredients, you reclaim control over your kitchen environment. You stop relying on luck or the perfect factory seal to dictate when you can bake. The ability to reverse the physical state of your pantry staples breeds quiet confidence.
The next time your spoon hits that solid, unforgiving wall of dehydrated molasses, you will not feel frustration. You will simply fetch the kitchen paper, confident in your ability to manipulate the weather inside a glass box, and get back to the baking you set out to do.
“True culinary skill isn’t about avoiding mistakes, it’s knowing how to coax a stubborn ingredient back to its intended nature.”
| Key Point | Detail | Added Value for the Reader |
|---|---|---|
| The Catalyst | Damp kitchen paper suspended above the sugar. | Prevents direct contact melting while providing maximum humidity. |
| The Environment | Microwaved on high for 20-second intervals. | Rapidly forces moisture back into the molasses without cooking the crystals. |
| The Action | Raking with a sturdy fork between blasts. | Exposes deeper layers of the brick to the steam, ensuring an even crumble. |
Frequently Asked Questions
Can I use a tea towel instead of kitchen paper?
Yes, a very lightly dampened, clean cotton tea towel works brilliantly, provided it has no lingering detergent smells that could taint the sugar.Will this work on standard white caster sugar?
No. White sugar hardens due to moisture exposure, not moisture loss. This steam method will only melt it.How long will the sugar stay soft after microwaving?
It will remain soft for a few days if sealed in an airtight tub, but it is best to only soften the exact amount you intend to bake with immediately.What if I accidentally melt the sugar into a syrup?
Unfortunately, once the crystals dissolve into the molasses, the structure is gone. You will need to start fresh, or use the syrup for a porridge topping.Is it safe to put the original plastic bag in the microwave?
Never. Thin plastic packaging will melt rapidly against the superheated sugar, ruining the food and potentially damaging your appliance.