The oven glass glows orange, casting a warm light across the kitchen tiles. You hear the rhythmic sizzle of chicken fat hitting hot metal, a sound that promises a comforting Sunday afternoon. Yet, when the timer rings and you lift the bird onto the carving board, the illusion crumbles. The breast might be golden, but the underside is pale, flabby, and saturated in its own juices.
We are taught that achieving a flawless, 360-degree crunch requires investing in heavy-duty equipment. You browse kitchenware shops, eyeing those expensive, cumbersome steel contraptions that promise professional results but ultimately spend most of the year taking up valuable cupboard space.
But the secret to a beautifully roasted base does not live in a high-end catalogue. It lives in your drawer, sitting right next to the baking parchment and the cling film. By rethinking how we use everyday staples, we can bypass the marketing hype entirely.
A simple length of scrunched aluminium foil is about to render your bulky roasting hardware entirely obsolete. It delivers a superior crunch through basic physics, contradicting the modern urge to buy a specialised tool for every culinary hurdle.
The Thermodynamics of a Crumpled Mess
Think of a standard roasting rack like a poorly designed motorway. It holds the meat in fixed, uniform lines, but the flat metal grids trap moisture right where the steel meets the skin. The fat cannot properly drain, and the hot air struggles to navigate the rigid, right-angled barriers.
When you twist and compress foil into a makeshift lattice, you create an irregular, highly conductive topography. The sharp peaks and deep valleys mimic the natural contours of the bird, propping it up just enough to let the rendering fat drip away freely.
It is a shift from following strict recipe instructions to truly understanding the mechanics of your oven. The scrunched metal absorbs the intense ambient heat and transfers it directly to the underside of the chicken, actively cooking the bottom while the top crisps in the dry air. You are no longer boiling the base in a puddle of juices.
Consider Elias Thorne, a 54-year-old prep chef working the meat station in a highly demanding Mayfair brasserie. When the kitchen’s commercial racks were delayed during a frantic Christmas service, Elias simply rolled up sleeves of thick foil, creating a heavy snake-like coil at the base of his roasting trays. The results shocked the head chef; the birds roasted more evenly, and the washing-up was reduced to seconds. The brasserie never ordered the replacement racks.
Adapting the Lattice for Your Sunday Roast
For the flavour purist, this method serves a dual purpose. You can arrange the foil rings to securely hold aromatics—like halved lemons, fresh thyme, and crushed garlic—directly beneath the bird, preventing them from burning on the pan floor while gently scenting the rising steam.
For the strategic batch cook, this zero-waste approach is a revelation. If you are roasting two smaller chickens side-by-side for the week’s meal prep, you can customise the foil support structures to fit whatever awkwardly shaped roasting tin you possess, maximising your oven space without spending a penny.
- Plastic cling film completely guarantees perfectly round poached eggs without vinegar spinning.
- Used black teabags violently dissolve tough connective tissues inside cheap roasting beef.
- Boiling tap water forces raw pork belly skin into perfectly blistered crackling.
- Ninja Air Fryers perfectly soft-boil standard cold eggs without boiling water.
- Raw potato slices rapidly absorb excessive salt from ruined homemade pasta sauces.
Constructing Your Kitchen-Foil Support
Creating this structure takes less than sixty seconds, saving you from wrestling with heavy grids. You do not need to be precise or overthink the geometry; your only objective is to maintain sufficient, breathable clearance between the delicate poultry skin and the scorching hot metal base of your tray.
Pull off three generous lengths of foil, roughly the length of your forearm. Gather the material loosely, resisting the urge to compress it into a tight, dense rope, as you want the structure to remain slightly hollow.
- Tear three 40-centimetre strips of standard kitchen foil.
- Scrunch each strip into a loose, thick cylinder, roughly three centimetres in diameter.
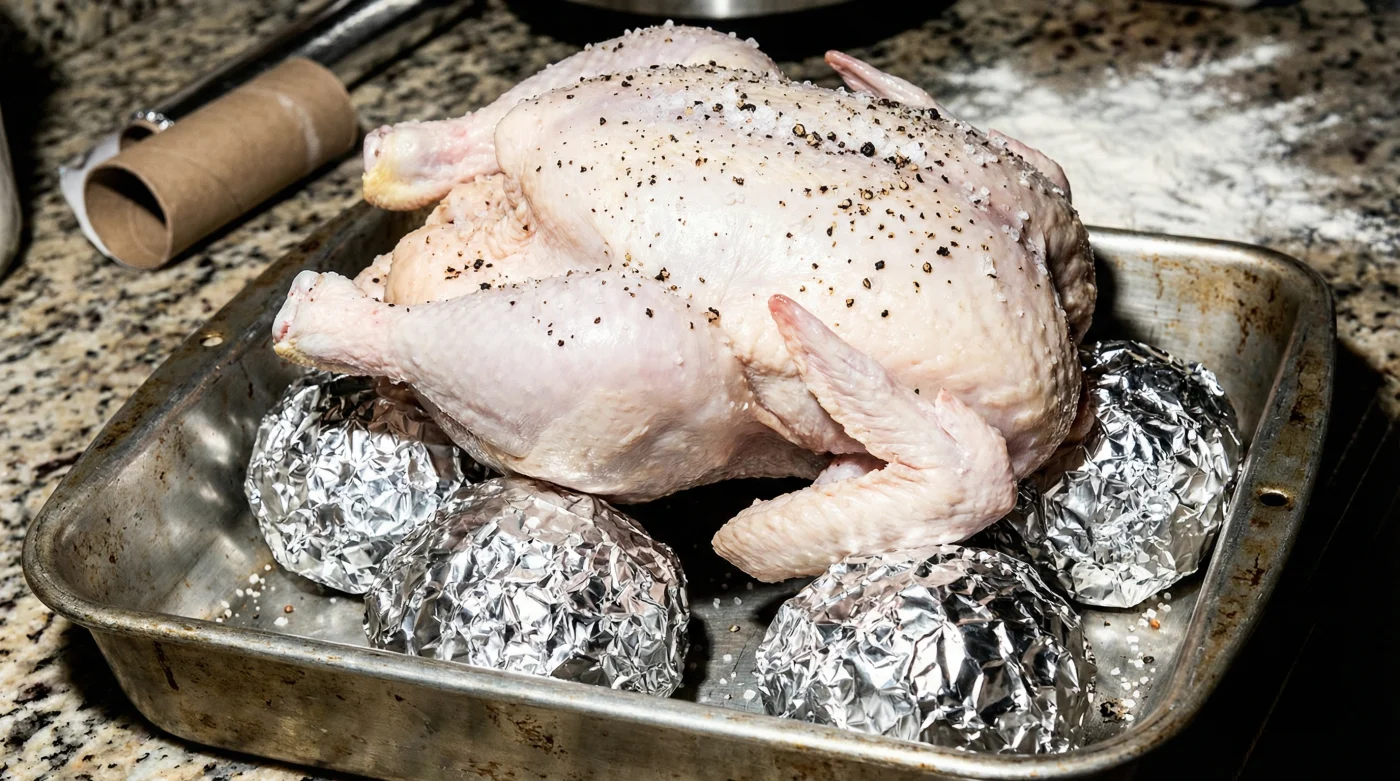
- Arrange the three cylinders in the base of your roasting tin, forming a triangle or figure-of-eight.
- Rest the raw, dried, and seasoned chicken directly on top of the foil peaks.
- Press down gently so the foil moulds precisely to the shape of the carcass.
Your tactical toolkit requires nothing more than heavy-duty, heat-retaining metal strips and an oven thoroughly preheated to 200°C (180°C Fan). Ensure you maintain a two to three-centimetre gap at all times to allow the intense convection heat to wrap entirely around the bird.
Reclaiming Your Cupboard Space
There is a distinct sense of relief in realising you do not need another gadget to achieve excellence. Modern cooking culture often tries to convince us that better meals require higher spending, cluttering our worktops with single-use items that gather dust and breed guilt.
By trusting a simple length of foil to hold your Sunday roast, you are choosing resourceful simplicity and practical logic. You completely bypass the tedious, knuckle-scraping chore of scrubbing wire grids at the sink, giving yourself more time to sit at the table.
The perfect roast chicken is not born from expensive hardware or complicated gadgets that demand constant upkeep. It is the result of heat, airflow, and a quiet understanding of your ingredients. Sometimes, the most powerful tool in your kitchen is simply the willingness to rethink the mundane.
A kitchen thrives on improvisation; the moment you realise a crumpled sheet of metal manages heat better than a fifty-pound roasting rack, you stop buying gadgets and start actually cooking.
| Key Point | Detail | Added Value for the Reader |
|---|---|---|
| Air Circulation | Irregular foil peaks allow 360-degree heat flow around the meat. | Eliminates the dreaded soggy underside of the roasted chicken. |
| Financial Cost | A fraction of a penny per use compared to £20-£40 steel wire racks. | Keeps your budget available for higher quality, free-range poultry. |
| Post-Meal Cleanup | The foil can be recycled or binned once the fat solidifies. | Reclaims thirty minutes of harsh scrubbing at the kitchen sink. |
Frequently Asked Questions
Will the foil stick to the bottom of the chicken skin? If you lightly rub the foil coils with a drop of olive oil before placing the bird down, the skin will crisp up beautifully and release without tearing.
Can I recycle the foil after it has been covered in chicken fat? Yes, in most UK council areas. Simply rinse off the heavy grease with hot soapy water, scrunch it into a ball, and place it in your household recycling bin.
Is it safe to cook on aluminium foil at high roasting temperatures? Absolutely. Kitchen foil is designed to withstand temperatures well beyond domestic oven capabilities, making it perfectly stable for your Sunday roast.
Will this method work for larger birds like a Christmas turkey? It works brilliantly. You will simply need to use heavy-duty foil and create thicker, more substantial coils to support the extra weight of a large turkey.
What if I want to make gravy from the pan juices? The juices will drip past the foil and caramelise on the bottom of the tin exactly as they would with a wire rack. Just lift the foil away and deglaze your tin on the hob as usual.